www.officehelp.biz
| www.officehelp.biz |
Office Tutorials & Software Solutions |
| Specializing in Advanced Spreadsheet & Office Macro Solutions. |
|
| Insert Automatic Tables of Contents in Microsoft® Word |
| Application | Microsoft® Word® | Version | 1.00 |
| Author | OfficeHelp | ||
| Tested on versions: | 2000 (9.0) - should work on any version from Office 97 | ||
|
||
|
It is fairly easy if you follow the right steps:
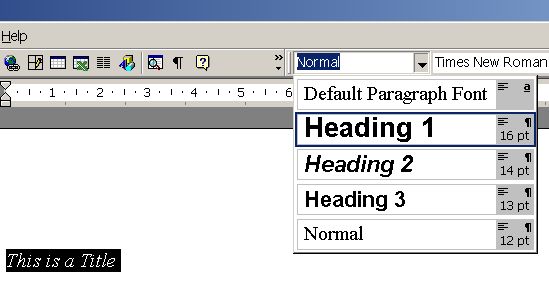
STEP 1 - Marking Titles The first thing to do is to mark each title as such, so Microsoft® Word can include them in the future Table of Contents:
You can have several levels of titles, but you shouldn't use all for the Table of Contents. Usually, up to 3 levels is appropriate, and for simpler documents the first may be sufficient. Decide for yourself according to the complexity of your document. STEP 2: Insert the Table of Contents To insert a Table of Contents on your document, after marking your headings, do this:
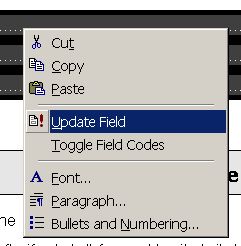
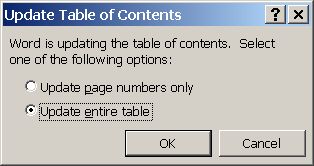
For the beginning, leave the options alone. Just insert the table of contents on your document using the default options. Once you're comfortable with it, make some testes with the options to see if they interest you. STEP 3: Refreshing the Table of Contents; Once done, you can edit your document at will without worrying about its data (title names, page numbers, ...). Updating is easy.
Both the text in the headings and the page numbers have been updated with no trouble at all! Defining your own Heading formats Word will format each heading you mark with the it's specific format. These formats are already defined on the template you're using (usually, Word default normal template). You will probably want to apply your own formatting to these headings, instead of the default ones. You can define your own font, size, and even if it should be automatically numbered or not. Explaining how to define this formats it's outside this PC Tip scope. We will publish a tutorial on it later. Subscribe our newsletter if you want to be warned about OfficeHelp.Biz new contents every month. Other option is to obtain professional grade ready-made templates with their own definitions. Choose one you like, buy it, and use it as a format seed for your own documents. Can I know more about this subject ? Check our FREE PC Tips and Tutorials. They will be regularly published. Better still, subscribe our Email Newsletter. You will be informed when contents updates are made and automatically granted participation on any future promotion.
|
(c) 2004 - 2024 OfficeHelp.Biz