www.officehelp.biz
| www.officehelp.biz |
Office Tutorials & Software Solutions |
| Specializing in Advanced Spreadsheet & Office Macro Solutions. |
|
| How to read Microsoft® Outlook emails without firing the Read Receipt |
| Application | Microsoft® Outlook® | Version | 1.00 |
| Author | OfficeHelp | ||
| Tested on versions: | 2000 (9.0) - should work on Outlook 97 and from versions | ||
| Read Outlook email, including attachments, without firing the read receipt, even on corporate email systems. |
|
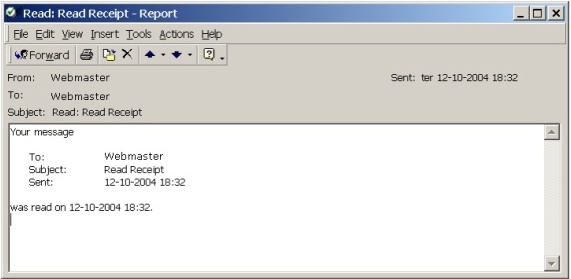
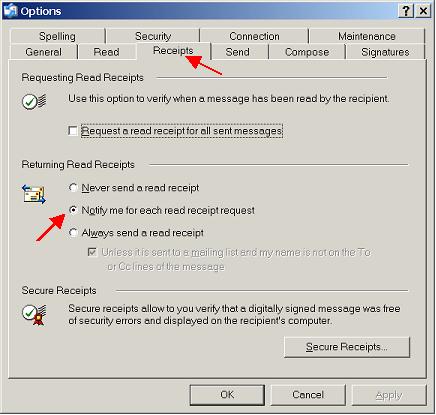
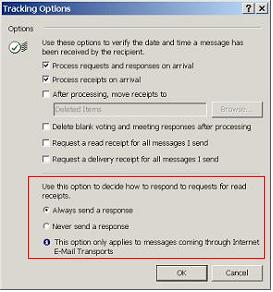
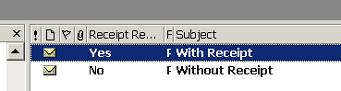
Read Receipts are messages that confirm to the sender that the email he sent was read by it's recipients (PIC. 1). The internet email protocol doesn't enforce them so they depend on the software being used to read email and can be easily switched off.
Corporate users are not so lucky. Their Read Receipt system is server based and therefore cannot be switched off by the end users. They can only avoid sending them as long as they can avoid reading the email. It is possible, however, to activate a combination of options that will allow the user to read the message, including attachments, without setting the message as read on the system. The Read Receipt, even if automatic, is not sent because, officially, the message as not been read. Email software considered on this Article The article is intended to Outlook users, from version 97 to 2003, with both Corporate and Internet email. But it also covers Outlook Express, the free internet email client Microsoft bundles with Windows and Internet Explorer. While less common on corporate environments, it is used in many small and medium enterprises and therefore worth the inclusion. No other email client software is considered, besides Outlook and Outlook Express . Outlook Express supports only Internet email, where read receipts are not standard. Therefore, the email servers won't process them. In this environment, users can request a Read Receipt when sending email, and the request will be included on the message. But it will be the receiver email software to send it, as an automatic reply (email) message. Since it is the receiver email software that sends the email, its user has complete control about it.
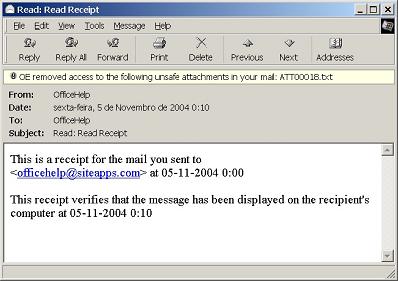
In Outlook Express, Read Receipts are regular emails automatically sent back to the sender. Therefore, they even apear on the Send Item folders (PIC. 3):
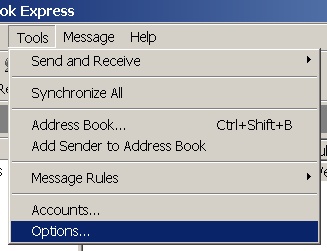
On Outlook Express, the following steps are necessary to set the Read Receipt options:
You can also opt to never or always send the Read Receipt. The default option is the recommended one. OUTLOOK 97 - 2003 Microsoft Outlook can be used in two versions, Internet only and Corporate. The first one is common in domestic and SMEs, the later in larger corporations having their own email servers. In the Internet Only version, it can be done in a similar way to Outlook Express. It is possible to define a rule on how to process Receipts, but strangely enough the "notify me" option doesn't exit. You will be forced to choose between "Never Reply" and "Always Reply". The process is the following:
If you're using Outlook on a Internet Only version and want to manage Read Receipts on each message, turn them on (Always Reply) and use the same trick as the Corporate version (see below). The Solution for the Corporate Version - managing receipts message by message On the Corporate version, managing Read Receipts is much more complicated:
The Trick is to simultaneous work around each of the issues identified above:
How to do it - Step by Step
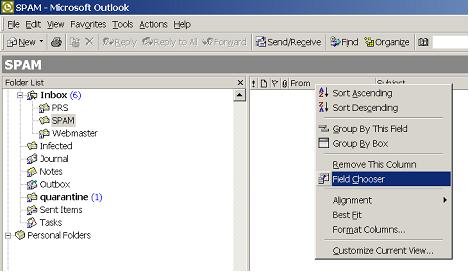
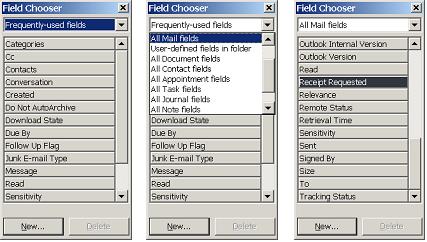
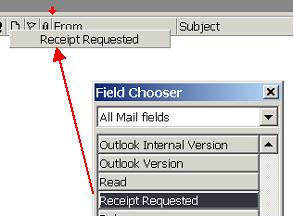
Knowing which messages requested a Read Receipt is important. While the trick to read messages without firing them could be applied to all messages, with or without the receipt request, it is more cumbersome and limited than fully opening a message. The best option when the message has no receipt request (and therefore its opening cannot be tracked) is still opening it. It is possible to list the Receipt status on the Inbox message list by following these steps:
Warning: This procedure works by mail folder. It will only affect the folder when it's done, and can be done on more than one email storage folder. If you have rules splitting new messages by several folders, you will have to activate this on each.
By default, Outlook will mark any unread message previewed on the Inbox (or any other folder) as read when selection changes to another message. This will fire the Read Receipt. Therefore, this default option has to be changed (disabled).
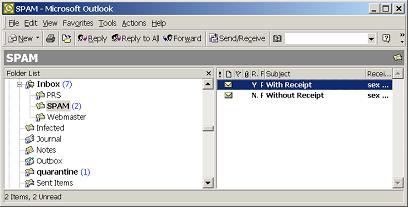
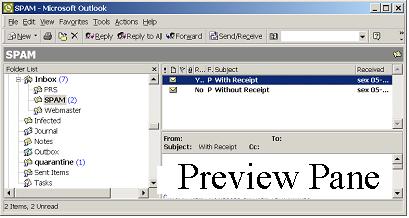
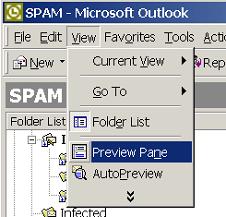
The only step left is being able to read the messages using the Preview Pane. The Preview Pane will split the email list horizontally (vertically on Outlook 2003) and show the message content below (right). The effect can be seen from PIC. 18 to PIC. 19:
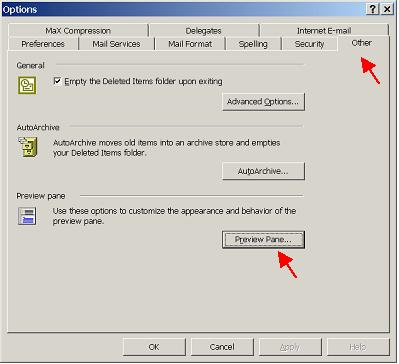
To enable to Preview Pane, use the Preview Pane option on the View menu, on the folder you want to read the messages:
The Preview Pane option on the View menu works like a toggle, switching the Preview Pane on and off. Improving the Preview Pane safety There is a potential risk associated with using the Preview Pane on the Inbox folder: if you get an infected (with some virus) email and your Outlook security settings and patches are not up to date, you may get infected when trying to read the message. It is safer to create a folder specifically to read messages with the Preview Panel. Do the following as best practice:
Final Step: An utilization warning Don't forget that these messages have officially not been read. Sooner or later you will have to (officially) read them or someone will complain that you do not read your email!!! Don't also forget that you cannot comment on the email content before you acknowledge its reading. Use this to manage WHEN to let others know you've read the email, not to FREEZE them unread until eternity. To mark a message as read simply open it (double click with the mouse over it).
|
(c) 2004 - 2026 OfficeHelp.Biz