www.officehelp.biz
| www.officehelp.biz |
Office Tutorials & Software Solutions |
| Specializing in Advanced Spreadsheet & Office Macro Solutions. |
|
| How to install an Excel AddIns |
| Application | Microsoft Excel | Version | 0.00 |
| Author | OfficeHelp | ||
| Tested on versions: | 2000 (9.0), XP (10.0), 2003 (11.0), 2007 (12.0), 2010 (14.0), 2013, 2016 - should work on any Windows version from 2000 | ||
|
||
|
This Article Applies to: This article applies to all Excel® versions since Excel® 97. Excel® 2007, the latest edition released by Microsoft, is compatible with most existing Add-Ins, but will display a completely different interface, so it has a special section on it.Most of this article will also apply to other Microsoft® Office®
applications like Word® or PowerPoint®, but they usually have much
less Add-Ins available than Excel®. What are Add-Ins? An Excel AddIn is an extension to Excel and, once installed, will load every time Excel is loaded, becoming “part” of Excel until it is deliberately uninstalled. They often add entries to existing menus of even whole menus or toolbars. Add-Ins can also supply additional functions that can be used in cell formulas like the native ones. They have been part of Excel for long and, in fact, Microsoft supplies several Add-Ins with Excel itself, with the most well known being the “Analysis Toolpak” and the “Solver”.Many Add-Ins are also supplied by Third Party software makers, either to extend Excel native functionality, providing additional functions and features, or to link Excel to data applications, common on corporate networks were Business analysts use Excel to manipulate data from corporate databases like ERPs, Accounting, Business Intelligence suits or other operational systems.
Add-Ins usually have the file extensions .XLA or .XLL. For
samples, try searching for “Excel Add-Ins” on any internet search
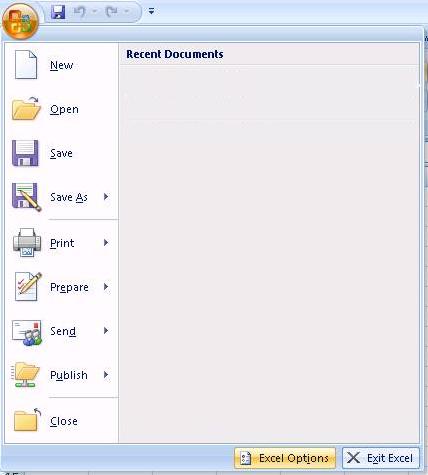
engine. You will find hundreds of them. How to Install / Uninstall Excel Add-Ins? Excel® 2007 Excel 2007 Add-Ins are managed from the “Excel Options” button on the “Office Menu” menu:
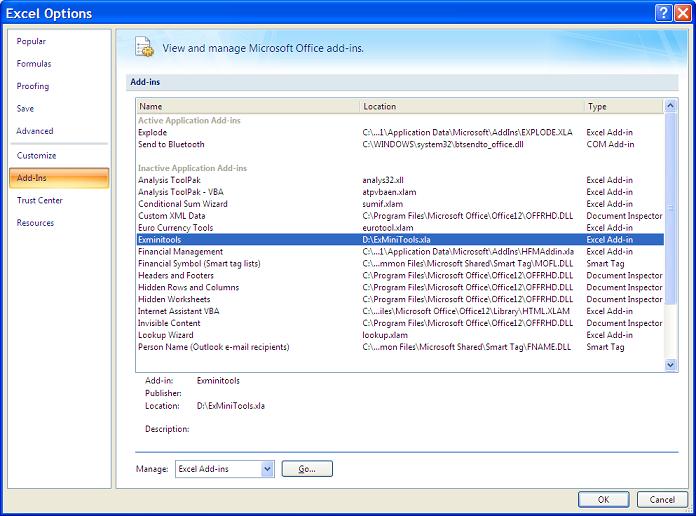
Select "Add-Ins" on the left side navigation column. Excel will list all available Add-Ins on the right pane window. On the bottom, select Manage: Excel Add-Ins and click "Go".
From here, follow the guidelines below on "All Excel Versions" as this will be common to all. Excel® 97 to 2003 Excel Add-Ins are managed from the “Add-Ins” entry on the “Tools” menu:
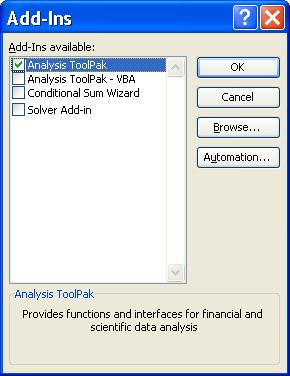
All Excel® Versions The above menu entries (depending on version) will both open a Pop-Up windows where you can activate / deactivate any AddIn Excel is currently aware of by checking / unchecking its respective checkbox:
Click Cancel to leave the Add-Ins as they were when the Pop-up opened, discarding any changes, or OK to activate the selections made. Activated Add-Ins will be loaded after OK and every time Excel is loaded after that, until selections are changed again. How to add new Add-Ins to the Add-Ins Available list? This article will ignore the “Automation” button, as it is used for
more technically complex Add-Ins.
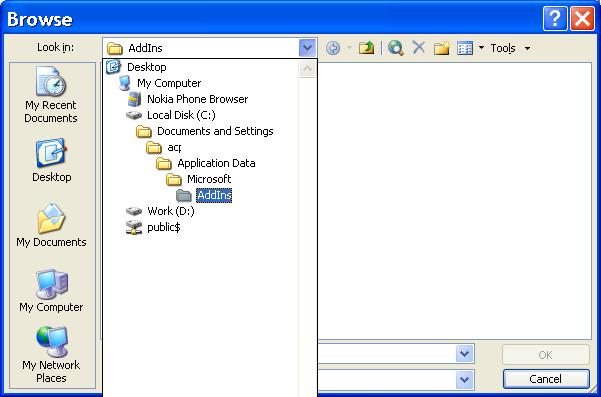
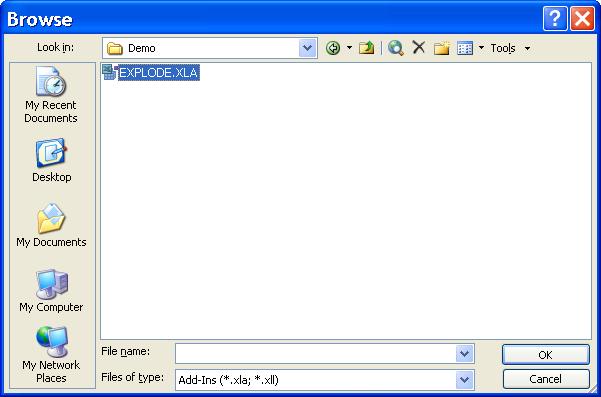
Excel has, by default, an Add-Ins folder and all Add-Ins saved on it will automatically be listed on the pop-up list. This is the easiest way to do it, but you need to know there the folder is located on your hard disk. Excel will tell you where it is. Click on the “Browse” button and you will get the regular “file open” dialog box, open by default on the Add-Ins folder:
Open the whole disk path (as on the picture above) to find it. Once you know where it is, open it using the Windows Explorer and save your new Add-In file there. After you have copied the Add-In file there, close Excel and open it again. Open the Add-Ins window and your file will be there (you will need to know its list name; the file supplier should tell you that).
Instead of finding the default folder and copying the file there, you may instead tell Excel that there is an Add-In somewhere else on the harddisk (or even on a network disk). Click on the “Browse” button, select the folder where the file is located and select it. Click “OK” and the file will be immediately added to the list.
Activating ALL Add-Ins: Why not? You should not activate all Add-Ins just because they are present and ready to be activated. Add-Ins take time to load and, the more you activate, the longer Excel will take to load. Leave frequent used Add-Ins activated so they are loaded every time, but activate less frequent ones only when necessary, deactivating them again when they are no longer needed.
|
(c) 2004 - 2026 OfficeHelp.Biz